

Introduction
Creating a web-based minimum viable product (MVP) like a habit tracker (with features like data storage, user login, and notification reminders) no longer always requires a full development team. New AI-assisted and no-code tools promise to help startup founders and product managers build functional prototypes quickly and on a budget. This article compares three approaches – Cursor, Firebase Studio, and Visual Studio Code (VS Code) – for building and deploying a web MVP without hiring developers. We’ll look at each tool’s core strengths, ease of use for non-developers, relevant features (database, UI, logic, auth, notifications), deployment options, mobile support, pricing, and pros/cons. A summary comparison table and a recommendation are provided to help you choose the best path for your needs.
Cursor (AI Code Editor)

Overview and Core Strengths
Cursor is an AI-powered code editor built on the VS Code engine, augmented with GPT-4 and similar models . In essence, it’s like having ChatGPT deeply integrated into your coding environment, aware of your entire codebase . Cursor offers intelligent code completion, error fixes, and even understands natural language commands for generating or editing code . This makes it feel like an AI pair-programmer: you can prompt it to write functions, modify code, or answer questions about your project. It’s “fast, intelligent, and familiar”, aiming to make you extraordinarily productive when coding . A notable testament to its approachability is that one user said, “My eight-year-old daughter built a chatbot in just 45 minutes using Cursor AI.” – highlighting how natural-language coding can lower the barrier to entry.
Setup and Learning Curve
Getting started with Cursor is straightforward: download and install the desktop app (available for Windows, macOS, Linux) and sign in or provide an API key for the AI models . The interface will feel familiar to anyone who has used VS Code, and you can even import your favorite VS Code extensions, themes, and keybindings . For a non-developer, the learning curve is moderate. On one hand, you can write plain-English instructions like “create a simple React component for a habit input form” and have the code generated for you. This significantly speeds up development and helps bypass some low-level coding details . On the other hand, you still need to understand the general structure of a web app and be able to guide or correct the AI. Cursor excels at producing code snippets and even multi-file updates on command, but if the AI’s output isn’t exactly what you envisioned, you’ll need to iterate with further prompts or do light manual tweaks. In short, Cursor can empower a semi-technical founder to produce code much faster than coding alone, but completely non-technical users may still face a learning curve understanding the code it produces. The tool is designed to assist developers of all levels, so it comes with features like codebase chat, documentation generation, and refactoring help to support learning and productivity .
MVP Features (Database, UI, Logic, Auth, Notifications)
Because Cursor is essentially a coding assistant and not a predefined platform, it does not provide built-in services like a database or auth out of the box – you choose and implement those, with the AI’s help. This means you have full flexibility in tech stack. For example, for a habit tracker MVP you could prompt Cursor to set up a backend (perhaps a simple Express.js server or integration with Firebase/Supabase) and it will generate the code. You could ask it to define a Firestore database schema for storing habits, or to implement Firebase Auth for user login, and it can produce the required code since it “understands” common frameworks. However, you must know (or discover via prompting) which technologies to use – e.g. telling Cursor “connect my app to a Firebase Firestore database” or “use Firebase Authentication for sign-ups and logins”. The UI is likewise code-driven: you can develop the front-end in HTML/CSS or a framework like React/Vue, and have Cursor generate components and styling based on descriptions you provide. There’s no drag-and-drop visual editor, but you might say “create a form with fields for habit name and target, and a submit button” and let the AI write the JSX/HTML for it. Notifications (such as daily reminders) would also be implemented via code – for instance, using a scheduling library or an external API. Cursor can help by writing a cron job (or a cloud function) to send emails or push notifications (e.g. using Firebase Cloud Messaging), but again the logic has to be prompted and coded. In summary, Cursor gives you AI assistance for every piece of the stack, but you’re still assembling the MVP’s features by writing (AI-generated) code. This approach offers immense flexibility – you can tap into any API or library – but it relies on you to direct the AI and verify the functionality.
Deployment and Publishing
Deployment with Cursor is not one-click but the tool can guide you through it. Since the output of Cursor is a standard codebase, you’ll deploy your web app much like a developer normally would. For example, you could use Firebase Hosting, Vercel, Netlify, or any hosting platform. Cursor won’t deploy on your behalf, but you can ask it to write deployment scripts or configuration. For instance, you might prompt “help me set up a GitHub Actions workflow for deploying to Firebase Hosting” or “generate a Dockerfile for my app”. The AI can output those files, which you then run or push to the appropriate service. If you prefer simpler routes, you can manually drag-and-drop your build to a host or use CLI tools; Cursor doesn’t hinder any method since it’s just an editor. The key point is that unlike Firebase Studio (which has a built-in publish button), Cursor does not abstract away the deployment step – you’ll handle hosting outside the editor (with AI help available for the configs). This is still fairly accessible: modern hosting services are quite user-friendly, and the AI can explain steps if you get stuck. But a non-technical user should be prepared to follow some deployment instructions (like setting environment variables or connecting a repository) as part of the process.
Mobile Support and Adaptability
Cursor itself is not limited to web projects – you can use it to write mobile app code as well, since it supports many programming languages and frameworks . For a web-based MVP, you might not need a native mobile app at all (a responsive web app or progressive web app could suffice). If you do want a mobile solution, you could have Cursor help build a React Native app or a Flutter app. The editor would assist in generating Dart or JavaScript code similarly. However, keep in mind that going this route requires setting up the appropriate development environment (which can be complex for mobile, e.g. Android SDK, Xcode, etc.). Cursor doesn’t provide mobile emulators or device previews – you’d run those on your machine. In short, Cursor is as adaptable as coding itself: you can target web, iOS, Android, etc., but you do so by coding (with AI assistance) and you’ll need some know-how to run and test mobile apps. For most non-developers focusing on a “web-based MVP”, the likely scenario is building a responsive web app that works on mobile browsers, which Cursor can facilitate by helping write mobile-friendly HTML/CSS and maybe service workers for PWA features. That gives you basic mobile support (users can add the site to their home screen, get push notifications, etc.) without writing separate native apps.
Pricing and Licensing
Cursor is commercially available with a generous free tier and a paid Pro plan. The Hobby (free) tier provides a couple thousand AI completions and some number of “slow” (lower priority) GPT-4 requests per month – enough to work on small projects. The Pro plan costs about $20/month and unlocks unlimited completions and a higher quota of faster GPT-4/Claude model usage . In practice, this means you can use Cursor’s AI as much as you need without worrying about tokens on the paid plan. For MVP development, you might get by on the free tier initially, and then consider upgrading if you’re doing heavy coding with it. There’s also a Business tier ($40/user/month) for teams, but a solo builder likely won’t need that. Visual Studio Code itself (the core editor Cursor is built on) is free, and Cursor’s pricing is solely to cover AI model costs . All code generated with Cursor is owned by you and can be used commercially without issues . This means you’re not locked in – you can always take the code elsewhere. Overall, from a budget perspective, Cursor is very approachable: you could potentially build your MVP at no cost using the free plan, or spend a modest amount for a one-month subscription during an intensive development sprint – far cheaper than hiring a developer.
Pros of Cursor
- AI-assisted coding productivity: Cursor can dramatically speed up development by generating code from natural language and auto-completing multi-line snippets . It acts as a 24/7 pair programmer, which is especially useful if you have limited coding experience. Routine tasks (setting up routes, form validation, etc.) become quicker, and you can focus on describing functionality.
- Flexible and powerful: Because you’re still working with code, you have full control over the app’s design and capabilities. Any feature possible in a coded app can be done with Cursor’s help – you’re not restricted to a preset menu of components. This flexibility is great for a habit tracker MVP if you have unique requirements. Plus, you can leverage numerous libraries (for charts, calendars, notifications, etc.) by asking Cursor to integrate them.
- Familiar dev environment: Cursor’s interface and workflows will be familiar to those with some coding background (it even has Git integration, debugging, and other VS Code features). This means there’s lots of community knowledge and extension support. It’s described as “fast, intelligent, and familiar” for a reason – you get modern IDE features plus AI. If you ever transition to full development or hand the project to a team, the codebase is in a standard structure that any developer can work with.
- No vendor lock-in: The output is just code. You can export or push it to your own repository, host it anywhere, and even stop using Cursor after the MVP – there’s no dependency on a proprietary runtime. This makes scaling or handing off the project easier down the line. Also, privacy-conscious users can enable a mode where code stays local .
- Community and improvements: Cursor is actively evolving, with planned improvements in multi-file editing and bug detection . It has an online forum and is being adopted by engineers at notable companies, indicating robust support and trust in the tool .
Cons of Cursor
- Requires some coding mindset: While Cursor reduces manual coding, it’s not a pure no-code solution. Non-developers will still need to understand and structure their project. For instance, if the AI produces an error or the app doesn’t work as expected, you must debug (the AI can assist, but you need to recognize there is an issue). In short, there’s still a learning curve to effectively use Cursor’s power – it assists coding but doesn’t completely eliminate the need for coding knowledge.
- AI limitations and inaccuracies: As with any AI, Cursor can sometimes produce incorrect or suboptimal code. It may “struggle with complex bug detection”, occasionally insert code in the wrong place, or lose context after long sessions . You might find that the AI’s output needs tweaking, or that you have to re-prompt in smaller steps if a single big prompt overwhelms it. There’s also a risk that if your instructions are ambiguous, the code might not do exactly what you intend, leading to iterative back-and-forth.
- No instant visuals: Unlike a visual builder, Cursor won’t show you a live app design as you prompt (you’ll need to run the app to see it). This can be challenging for non-designers who aren’t sure how to specify UI details in words. For example, achieving a pixel-perfect layout may require multiple prompt-refine cycles or hand-tuning CSS.
- Deployment and DevOps overhead: As noted, you still have to handle deployment and environment setup manually (with guidance). For someone with zero dev experience, setting up a database connection string or configuring hosting can be daunting, even if the AI provides instructions. There’s less “one-click” simplicity compared to Firebase Studio in this regard.
- Cost for advanced AI models: If your MVP development heavily relies on GPT-4 level intelligence (for complex code generation), you might need the Pro plan. While $20/month is not huge, it’s an added expense. By contrast, Firebase Studio’s AI is currently free in preview (using Google’s Gemini model). Also, GitHub Copilot in VS Code is $10/month , which is another pricing reference. So budget-conscious users should plan for the possibility of a Cursor subscription if the free tier limits become a bottleneck.
Firebase Studio (AI App Builder)
https://studio.firebase.google.com
Overview and Core Strengths
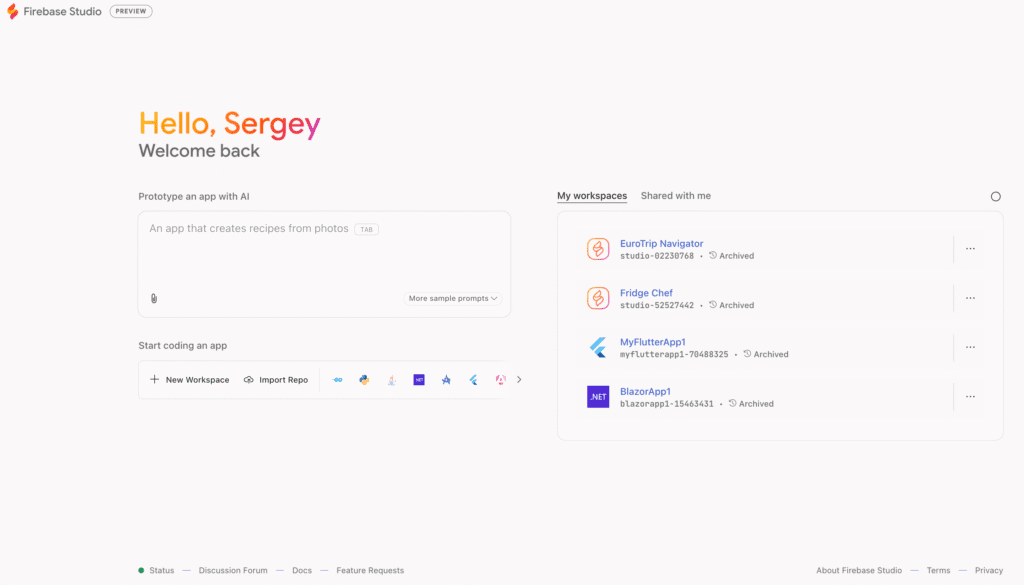
Firebase Studio is Google’s new AI-powered development environment that aims to take you “from idea to MVP in minutes” . It is essentially a cloud-based, full-stack app builder that leverages Google Firebase’s backend services. With Firebase Studio, you can literally type a prompt describing the app you want – for example, “a habit tracker app with user sign-up, a list of daily habits, and a reminder notification each evening” – and the platform will attempt to generate a working application for you. It was born from Google’s Project IDX and rebranded to focus on tight Firebase integration . Under the hood, Firebase Studio uses Firebase’s suite (Firestore database, Firebase Auth, Cloud Functions, Hosting, etc.) and Google’s Gemini AI model to build applications . Its core strength is that it abstracts much of the coding: you get a visual interface and AI “agents” doing the heavy lifting. Compared to Cursor (which assists you in writing code), Firebase Studio tries to write the entire app for you (front-end and back-end) based on high-level instructions . It’s been described as an “AI-native” development tool in the same vein as Replit’s Ghostwriter or Lovable AI builder . The environment includes a code editor, but also a real-time preview of the app and tools to visually tweak components (for instance, you can click on a color palette to change theme colors) . Overall, Firebase Studio’s vision is an all-in-one, beginner-friendly platform: you conceive an app, it generates the code and UI, and you can refine it visually or through dialogue with the AI.
Ease of Setup and Learning Curve
One of Firebase Studio’s biggest advantages for non-developers is its zero-install setup. You just visit the Firebase Studio website (studio.firebase.google.com) and log in with a Google account – no environment configuration needed . Within the browser, you have an IDE powered by Google’s cloud. Starting a project can be as simple as hitting “Prototype with AI”, entering a prompt about your desired app, and waiting a minute or two for the AI to generate the initial code and interface . The learning curve to get something running is extremely low: even without coding knowledge, you could get a basic habit tracker prototype generated. However, learning to get the right results is a bit more involved. In practice, early users have found that you may need to iterate on prompts or use provided templates. For example, one tester tried building a Flappy Bird game and noted, “I wasn’t able to generate the game with zero-shot prompting. Faced multiple errors but was able to resolve them.” They found that “the code generation was very fast” but the initial attempt required tweaks . This suggests that while the AI does a lot, you still need to guide it, especially for more complex features. The interface is fairly intuitive: it has a VS Code-like code panel (for those who can code or want to inspect), a visual preview panel for the app UI, and an “AI chat” or prompt panel (Gemini panel) where you give instructions . Non-developers can rely mostly on the visual tools and prompt dialogue, adjusting the app by saying things like “make the login page more colorful” or using a drawing tool to indicate changes . Firebase Studio’s learning curve is thus low for basic prototyping (you can drag components, edit text, etc.), but potentially moderate for refining advanced logic. If the AI doesn’t fully implement a feature (say, scheduling a daily notification), you might have to engage with the generated code or break the task into simpler prompts. The product is still in preview (beta), so expect some rough edges. As one early review put it, “Firebase Studio has some genuinely exciting ideas, but I don’t think it is ready to build production-ready apps on its own just yet.” . In summary, absolute beginners can get started easily, but should be prepared for some trial-and-error with the AI and possibly learning a bit about Firebase’s concepts to harness the full power.
MVP Features (Database, UI, Logic, Auth, Notifications)
Firebase Studio shines in providing out-of-the-box features for MVPs because it’s built on Firebase. When you generate an app, it will typically set up a Firestore database to store your data and may include basic Firebase Auth if your prompt indicates user accounts (although in tests it sometimes omitted auth until asked explicitly) . The UI is created for you – usually a simple web interface using standard web tech (the code editor suggests it could be using React or another popular framework, though the user doesn’t need to know). You also have a visual prototype mode where you can click on elements, reposition them, or change properties through a GUI. For instance, after generation you might see a basic list of habits; you could then drag a new button onto the interface or use a sidebar to adjust styles (the exact UI builder capabilities are evolving, but the goal is to allow editable components and styling without code) . The business logic can be handled by Cloud Functions (serverless functions) – if your app needs to do something on the backend (like send a notification or perform calculations), Firebase Studio can create Cloud Function code as part of the generation. In one prompt test, however, the AI initially “dropped the Cloud Function and Firestore requirements” that the user asked for, requiring a second attempt . This indicates that while the pieces are there, the AI might not wire everything up perfectly on the first try.
For a habit tracker, Firebase Studio would likely create a Firestore collection for habits and maybe a simple web page where habits are listed and can be checked off. If asked for notifications, since it’s a web app, it would presumably involve Firebase Cloud Messaging (FCM) for push notifications. This is possible – Firebase supports web push notifications – but it’s unclear if the current Studio AI will configure that automatically. You might have to prompt something like “send a push notification each day at 9am as a reminder” and the AI might then set up a Cloud Function with a scheduled trigger (Firebase has schedule triggers available) or use FCM for real-time pushes. Auth can be as easy as including “login” in your prompt: Firebase Auth can provide email/password or Google login flows with minimal configuration, and the Studio might generate a basic login page and hook it to Auth. Early feedback did note that some expected features (like auth) might be missing in the initial prototype and needed manual enabling . The good news is the environment lets you add them after the fact – either by prompting the AI again (“add user authentication”) or by using a template that includes auth. Google also provides templates in Firebase Studio for common app types. In fact, aside from prompt-based generation, Firebase Studio offers template-based project creation (for example, a Node.js Express backend template, or presumably a template for a typical web app) . Using a template can ensure the basics (like auth or a certain framework) are set up correctly, which you can then customize with AI.
In summary, Firebase Studio provides most MVP-critical features out of the box: a database (Firestore) that scales, user authentication, cloud functions for logic, file storage (if needed, via Firebase Storage), and even analytics/crash reporting in the Firebase ecosystem. UI building is partly automated and partly visual edit, making it easier to achieve a working interface than writing code from scratch. Notifications can be implemented since you have the full power of Firebase (FCM for push, or scheduling via Cloud Functions), but it may require some specific prompting or configuration – it’s likely on the more advanced end of what the AI can do automatically at this stage. Overall, for an MVP, Firebase Studio covers the breadth of features you’d typically need, and the advantage is these pieces are pre-integrated (your front-end will already be connected to the Firestore DB it set up, etc., without you handling API keys or credentials manually).
Deployment and Publish Options
Firebase Studio was designed to streamline not just building but also deployment. Once your app prototype is working in the preview, deploying it live is intended to be very simple. There is a “Publish” button in the interface – clicking it opens a side panel with steps to publish the app to Firebase Hosting . In practice, the first time you publish, you’ll need to enable billing on your Firebase project (Firebase’s free Spark plan doesn’t include Hosting for dynamic sites, so it upgrades to the Blaze pay-as-you-go plan, though you won’t be charged if you stay within free usage limits) . One reviewer recounts that upon clicking Publish, they were prompted to create a billing account (to enable Blaze plan) and then Firebase Studio automatically deployed the app to hosting once that was done . This one-time setup can be a bit clunky – the reviewer hit a “URL not found” after enabling billing, had to refresh, etc., but eventually succeeded and “ended up being able to select my billing account and publish my app.” . After publishing, your app gets a Firebase Hosting URL (usually something like yourproject.web.app) that you can share. Additionally, because Firebase Studio has integrated Git support, you might also connect the project to a GitHub repo for version control. The official site mentions you can import repos and presumably push changes . In terms of other deployment options: the official Firebase Studio page notes you can also deploy to Cloud Run or even your own infrastructure if you need to . This implies you’re not strictly locked to Firebase Hosting – though using Hosting is the easiest path (few clicks). It’s safe to say Firebase Studio offers the smoothest deployment experience of the three tools: it’s built-in and largely automated. For a founder who doesn’t want to fiddle with servers, this is a big plus. Just be mindful that enabling billing is required for the publish step (the hosting itself can be free for low traffic, but Google wants a card on file for usage beyond free tier). Once deployed, Firebase provides an array of monitoring tools (Analytics, Performance Monitoring, etc.) accessible from the Firebase console, which is great for seeing your MVP’s usage.
Mobile Support and Adaptability
Firebase Studio is not limited to web apps; it markets itself as a platform to build web and mobile apps, all in one place . In fact, it includes built-in Android emulators and web previews to let you see how your app would look on different devices . This indicates you could develop, say, an Android app UI and test it within Firebase Studio. Under the hood, it might use Flutter or Android Studio frameworks for mobile templates – the details aren’t explicit, but given that you can import various frameworks, it likely supports generating Flutter/Dart code or even React Native if prompted. At minimum, the presence of an Android emulator means you can run an Android project directly in the browser IDE. For a habit tracker, you might decide to build a simple web app first (accessible on mobile browsers). If you specifically want a native mobile app, you could try prompting Firebase Studio for a “React Native habit tracker app” or use a Flutter template. This is more ambitious and might require more tinkering, but it’s theoretically supported. A comment from a user early on mentioned they wished to “test the responsiveness of the application in the studio UI itself” – at the time, the tool may not have had a quick mobile preview for responsive design. But the official info now highlights cross-platform preview, suggesting the product has evolved. Adaptability: Firebase Studio supports importing existing code and many tech stacks . That means you could start a project by importing a GitHub repo or choose a template for, say, Next.js or Angular if you prefer. It’s not a closed system – you have a full code editor, so a developer could manually write or edit any part of the code if needed. This hybrid nature (AI + your code) is powerful. For a non-developer, it means if the AI hits a limit, you could potentially bring on a developer to tweak the code within the same environment. In terms of mobile adaptability, Firebase Studio’s promise is to let you maintain web and mobile from one place. Practically, that might still mean separate codebases (web app vs mobile app), but you can manage them in different workspaces. The tool is in active development, so its mobile capabilities are expanding. At the very least, any web app you build can be made mobile-friendly (responsive) and hosted easily, which covers a lot of MVP use cases without building native apps.
Pricing and Licensing
During its preview (as of 2024–2025), Firebase Studio is free to use. By default you get up to 3 workspaces at zero cost , meaning you can create three separate app projects without paying anything. Members of the Google Developer Program got higher limits (up to 30 workspaces) . The only costs you might incur are the usage of underlying Firebase services: Firebase’s Spark free tier covers quite a bit (e.g. a certain number of database reads, auth users, etc.), but if your MVP usage goes beyond those or uses services that have no free tier (like if you make a lot of AI calls to the Gemini model beyond free allowance, or you need to send tons of notifications), you would need to attach a billing account and pay per use . Essentially, Firebase Studio will auto-upgrade your project to the Blaze (pay-as-you-go) plan if necessary, at which point charges follow Firebase’s standard pricing for whatever you use (Firestore, FCM, etc.). For a typical small MVP with few users, the costs are likely negligible and within free quotas. The AI generation itself (Gemini model) currently doesn’t cost the user separately while it’s in preview – Google is footing that bill, but that could change once out of preview or if heavy usage is detected. There’s no separate licensing fee for the tool; it’s part of Firebase. You own the generated code, though it’s somewhat coupled with Firebase services (e.g., a Firestore-centric app might need refactoring to run on a different backend). One should note that if Firebase Studio remains free, it’s a very cost-effective option. Even when billing is enabled, Firebase’s pricing is friendly to low-volume prototypes (for instance, hosting and Firestore have free allocations each month). In short, Firebase Studio is essentially free to start, and costs scale with your app’s usage – you pay for what you use on Firebase, with no upfront fees. This makes it attractive for budget-conscious founders. Just be cautious to monitor usage if your app unexpectedly takes off, as beyond-free usage will incur charges (though for an MVP scale, that’s rarely a big concern).
Pros of Firebase Studio
- Extremely beginner-friendly: You can literally get a running app without writing code. Natural language prompts and a visual editor make it accessible to those with no programming background. The quick setup (browser-based, no install) and guided process from idea to deployment are ideal for a non-developer trying to validate an idea fast.
- Integrated end-to-end solution: Firebase Studio handles everything from front-end UI to back-end database to hosting in one unified environment. This integration means you don’t have to stitch together different services – e.g., user accounts, data storage, and server logic are all provided by Firebase and orchestrated by the Studio. For a habit tracker MVP, this means features like real-time sync, offline support, and secure auth are available without extra effort, thanks to Firebase.
- Fast iteration with AI assistance: The AI can generate a lot of boilerplate in minutes , which would take a novice weeks to code. It’s also interactive – you can refine the app by chatting with the AI (e.g., “make the add-habit form pop up instead of on a separate page”) and it will try to apply the changes. The visual feedback loop is quick: you see a live preview of the app as you modify it. This makes iterating on the MVP’s design and functionality relatively fast and fun.
- Visual editing and design tools: Unlike pure code editors, Firebase Studio offers UI manipulation tools. Being able to drag components, click to change colors, or even draw a bounding box around elements to describe a UI change is a huge plus for those who think visually. It reduces reliance on knowing CSS or design frameworks. This lowers the bar for customizing the look and feel of your MVP beyond default styles.
- Leverages the robustness of Firebase: By using Firebase under the hood, your MVP is built on a production-grade backend (used by many real apps). This means features like cloud storage, push notifications, analytics, and more are available when you need them. It also means your MVP could scale without a complete rewrite – if the concept takes off, you can continue building on Firebase. The environment even supports adding standard VS Code extensions , so as you grow more confident, you can incorporate tools like linters or even use the terminal for advanced tasks. All in all, you get a lot of power without leaving the platform.
Cons of Firebase Studio
- “Beta” reliability and limitations: Firebase Studio is a new tool still in preview, and it shows. Users have reported various bugs and hiccups – from generation failing the first time (e.g., a blank screen output ) to glitches in the publish process . The AI sometimes produces incomplete features (e.g. leaving out auth or dropping a requested Cloud Function) . These issues mean you might spend time troubleshooting the tool itself, which can be frustrating if you expected a smooth no-code experience. In one evaluation, the UI generated was “quite basic” and certain design requests were ignored until multiple prompts , indicating the AI isn’t perfect at fulfilling complex or aesthetic asks yet.
- Needs manual intervention for polish: While you get a working prototype quickly, making it truly polished or adding nuance might require coding or clever prompting. The AI tends to produce boilerplate, which can be a bit generic. For example, you might want a slightly different data model or a custom notification logic that the AI doesn’t know about – you then have to dive into the code editor and implement or fix it yourself. Early testers noted that the results “might need more manual work to improve the quality of the output” . So, despite being “no-code” to start, if you have specific requirements, be ready to do some low-code tweaks. This is especially true if the AI leaves something in a broken state (one report mentioned features being only partially implemented, with errors that needed resolving in code) .
- Potentially constrained by Firebase’s paradigm: Firebase is great, but it has its own way of doing things (NoSQL data structure, serverless functions, etc.). If your MVP needs something outside the Firebase mold, you might hit a wall. For instance, advanced SQL queries or joining data across collections is not straightforward in Firestore. Similarly, if you wanted your habit tracker to, say, integrate with a third-party API (like Google Calendar for reminders), you would have to manually code that in a Cloud Function; the AI might not handle such integration out of the box. You’re somewhat locked into Firebase’s ecosystem with this tool – extracting the project to another stack could require significant rework (though you can export code, it will be Firebase-flavored code).
- Scalability of collaboration and version control: Currently, Firebase Studio is oriented towards a single user building an app. It does have GitHub integration for importing/exporting, but it’s not clear how smooth collaboration (multiple people editing) is. In VS Code, collaboration can be done through Git easily; in Cursor, at least you can share code files. In Firebase Studio, if a team of two or three wants to work on the MVP, they might have to take turns or split front-end and back-end in different workspaces, etc. This is a minor con for a solo founder, but worth noting if you plan to involve a technical friend later – they’ll have to adapt to this environment or just pull the code to work locally.
- Uncertain future costs and model limits: Right now it’s free, but it’s a preview. Google could introduce pricing for the “Studio” service or limit free AI generations in the future (for example, after preview, maybe only X free generations per month and then paid). There’s also the requirement to be online and possibly in a supported region (since it’s a cloud service). If you prefer local development or offline capability, this won’t work. Also, using the latest AI (Gemini) might eventually tie into a paid Google Cloud service. In short, enjoy the free preview but keep an eye on announcements to avoid surprise costs later on.
VS Code (Traditional Coding Approach)

Overview and Core Strengths
Visual Studio Code (VS Code) is a popular free code editor from Microsoft, renowned for its versatility and rich feature set . Unlike Cursor or Firebase Studio, VS Code is not an AI or high-level builder – it’s the traditional approach where you write the code yourself (though you can augment it with AI extensions like GitHub Copilot). Its core strengths lie in being lightweight yet powerful: it supports virtually every programming language and framework through extensions, offers intelligent code completion (IntelliSense), debugging tools, built-in Git version control, and a huge ecosystem of plugins . For any professional developer, VS Code is often the default environment, and it’s equally accessible to beginners since it’s free and well-documented. Choosing VS Code for your MVP means you are effectively going the route of hand-crafting your application (or at least using standard frameworks and possibly copying code from tutorials). This gives you maximum control. You’re not constrained by AI generation capabilities or a specific platform’s services – you can build whatever you envision, using any tech stack that fits a web-based habit tracker (e.g. a React front-end with a Node/Express or Django back-end, or even a no-server approach using a combination of static site + Firebase as backend). The tagline for VS Code could be “freedom and control”: it’s ideal if you (or someone on your team) has coding skills or you’re willing to learn, because you can tailor the MVP exactly to your needs and make it as simple or complex as desired. The editor itself is very user-friendly with a clean UI, and the wealth of extensions means you can add tools to assist with anything (from UI design to database management) . Notably, VS Code has a huge community, so for any problem you encounter, there are likely answers on Stack Overflow or YouTube tutorials covering it.
Ease of Setup and Learning Curve
Setting up VS Code is easy: download it from the official site and install – it runs on Windows, macOS, and Linux seamlessly . The editor will open to a welcome page with suggestions for popular extensions and tips. For a non-developer, the challenge is not the editor itself, but learning to code the MVP. VS Code doesn’t hold your hand in building the application’s features; you’ll need to either know or learn the relevant programming languages (HTML/CSS/JS for web front-end, maybe some back-end language or use a service for back-end). The learning curve is highest in this approach. However, VS Code does make coding as pleasant as possible for beginners – it has IntelliSense to autocomplete code and point out mistakes, and many extensions are geared towards helping newcomers (like snippets, or live server preview, etc.) . Additionally, one could install GitHub Copilot (an AI code suggestion tool that costs ~$10/month) to get some AI help in VS Code . Copilot can suggest lines of code or even entire functions based on context, which is somewhat similar to Cursor’s autocomplete (though without the full chat experience). Many startup founders actually use ChatGPT in parallel with VS Code: they might ask ChatGPT to generate a chunk of code, then paste it into VS Code and run it. This semi-manual process can work, but it’s not as integrated as Cursor’s approach. If you are completely new, expect to invest time in following tutorials (for example, a tutorial on “Building a simple habit tracker in JavaScript”). The community around VS Code is a big plus: there are countless free resources, videos, and forums for learning web development. And since VS Code is “designed to make coding efficient and enjoyable” , it won’t be fighting you as you learn. It’s considered beginner-friendly in the coding world, with one article noting “for beginners, it’s a great starting point due to its ease of use, helpful community, and wealth of online resources.” . Summing up, ease-of-use for VS Code is dual-sided: the editor itself is easy to use, but using it effectively to build an MVP requires learning programming basics, which is a significant time investment if you’re starting from scratch.
MVP Features (Database, UI, Logic, Auth, Notifications)
Out of the box, VS Code provides no specific MVP features – it’s just an editor. All the features (database, UI, etc.) are up to you to implement or integrate via code. This means you have the ultimate flexibility in choosing how to implement each feature: you’re free to use any database (SQL, NoSQL, a simple local JSON file, etc.), any UI framework (or vanilla HTML/CSS), any authentication method, etc. For a habit tracker, for example, you could decide on a lightweight stack like a single-page application using a JavaScript framework and a cloud backend. You might use Firebase’s SDK in your code (without Firebase Studio) – e.g., directly call Firestore and Auth from your JavaScript app. That would give you the same underlying features (database, auth) but you’d write the code to call them (the Firebase documentation has guides for that). Alternatively, you could set up your own database – maybe use SQLite or PostgreSQL on a server if you’re comfortable with back-end coding. UI building in VS Code can be aided by UI libraries (like using Bootstrap or Material UI for React to get pre-styled components). But you will be writing markup and styling to get the interface you want. This is more effort than a drag-and-drop or AI-generated UI, but it allows for a custom, potentially more polished design if you have the skill. For logic, you’ll implement the app’s behavior in the language of your choice (JavaScript/TypeScript for front-end logic, and optionally a back-end language for server logic). Auth can be integrated by using libraries or SDKs. For instance, adding Firebase Auth to a custom app is a matter of including Firebase’s JS library and calling firebase.auth() methods – many tutorials exist, and VS Code will just be where you write and test that code. Similarly, notifications require coding the solution: you might use the Notifications API for web push (with a service worker and something like Firebase Cloud Messaging or OneSignal to handle sending pushes), or decide on email reminders via an email API (which could be simpler). All these are entirely possible in VS Code, but they demand knowledge of various APIs and time to glue everything together. The advantage is that you can pick simpler or more complex implementations based on your comfort. For example, if real-time push notifications feel too hard to implement, you might opt for sending daily reminder emails via a service like SendGrid – just call their REST API from your back-end once a day. Because you’re in full control, you can make such trade-offs to suit your skills and still meet the MVP’s goal (reminding the user, even if via email instead of a mobile push). In essence, VS Code gives you a blank canvas – every MVP feature has to be added by you, but there is a huge ecosystem of packages and templates to help. You might start from a project template (for instance, use Create-React-App or Next.js to scaffold a basic web app, or use a boilerplate with authentication pre-configured). Many open-source boilerplates exist for common use cases, which you can find on GitHub and open in VS Code to modify. This approach requires discernment (picking the right tools) but yields a tailored MVP with exactly the features you decide, no more no less.
Deployment and Publish Options
With VS Code, deployment is a separate concern from the editor – you have to use external services or hosting methods. Fortunately, the web ecosystem has made deployment fairly easy in recent years. If your MVP is a static front-end (HTML/CSS/JS or a compiled single-page app), you can host it for free on platforms like Netlify, Vercel, or GitHub Pages. If it’s a full-stack app with a server, you can use Heroku, Render, Fly.io, or deploy on Firebase/Google Cloud, AWS, etc. The choice can be overwhelming, but plenty of guides exist. VS Code itself has some integration that can simplify this: for example, there are extensions that allow one-click deployment of a folder to Azure or to Firebase Hosting. Or you can use the built-in terminal in VS Code to run deployment commands (like the Firebase CLI, Vercel CLI, or Docker commands). For a beginner, using a service like Vercel might be very straightforward – you connect your GitHub repository and it auto-deploys on every commit, giving you a URL. But getting to that point means you need to know how to use Git and GitHub. Alternatively, even simpler, some sites allow dragging and dropping your build folder to publish. In any case, the process is manual compared to Firebase Studio’s integrated publish button. You have to learn the steps, but once you do it once, it’s repeatable. For a habit tracker web app, you might, for example, build it and deploy on Netlify (which could be as simple as linking your Git repo or even using their GUI to upload files). If you have a separate server (for notifications or API), you might deploy that to Heroku with a few commands. VS Code doesn’t restrict where you deploy – you have complete freedom to choose a hosting that fits your budget (many have free tiers for small apps). The trade-off is that as a non-developer, figuring out deployment can be a stumbling block (often the “it works locally, now how do I put it online?” dilemma). This is where community resources help: for basically every combination (React app to Netlify, or Node app to Heroku, etc.) there’s a tutorial. It might take an afternoon of research and trial but is definitely achievable without much money (mostly free services) – just some patience. One advantage of going the VS Code route: you’ll inherently learn a bit about deployment and devops, which is valuable knowledge for a founder coordinating with developers later. Also, because you have full access, you can set up things like custom domains, environment variables, and other deployment configs exactly as needed.
Mobile Support and Adaptability
As with other aspects, VS Code itself doesn’t provide mobile-specific support beyond being able to edit mobile app code. If you wanted to build a native mobile app for your MVP (instead of or in addition to a web app), you could use VS Code to develop a React Native or Flutter application. VS Code is actually a popular choice for Flutter developers and can be used for React Native as well. However, building a mobile app comes with the overhead of setting up emulators or connecting devices, installing SDKs, and understanding mobile app development paradigms – which is significantly more complex than web development. Many MVPs forego a native app initially and just ensure the web app is responsive on mobile browsers, which is a perfectly fine approach (and probably the one we’d recommend to a non-developer for speed). If a mobile app is a must (say, you need to send local notifications or integrate deeply with phone features), VS Code can handle it but expect a steep learning curve. Adaptability-wise, VS Code is unmatched: you can work with virtually any language or framework . For instance, if down the line you decide to switch your backend from Firebase to Supabase or to a custom server, you just change your code – no limitations imposed by the tool. This adaptability extends to scaling: developers can take your VS Code project and continue building on it in any environment (VS Code or others) because it’s just standard code. Also, VS Code can be enhanced by numerous extensions for specific tasks – e.g., an extension to manage Firestore data, or one to design Swagger API docs, etc. In terms of cross-platform concerns, since you handle everything, you’d ensure your web app is mobile-friendly via responsive design (with CSS media queries or using a responsive UI framework). Testing that in VS Code means running the app locally and resizing your browser or using browser dev tools to simulate mobile screens. It’s a bit manual but standard practice. If using something like Ionic or React Native for a hybrid approach, VS Code can integrate with emulators (there are extensions to run Android emulator or iOS simulator from within VS Code, for example). These require more setup, but the capability is there. Overall, VS Code allows the MVP to be whatever you need it to be, but it’s up to you to build in mobile support or any other adaptability – nothing is automatic.
Pricing and Licensing
VS Code is completely free and open-source (the core codebase is under an MIT license, and the Microsoft-distributed binaries are free to use). There are no usage limits or paid tiers for the editor. This means you can install it on any number of machines at no cost. All the extensions in the marketplace are also free (some might require external services that cost money, but the vast majority are free). From a tooling perspective, this is the most budget-friendly option. You could build your entire MVP without spending a dime on development software. The costs only come from any external services you choose for your app – for example, if you use Firebase services, the same usage costs would apply as discussed earlier, or if you use a third-party API that charges, etc. But you have the flexibility to choose free-tier options for many components (free database tiers, free hosting, etc.). If you opt to use GitHub Copilot in VS Code for AI assistance, that’s $10/month after a free trial – still quite affordable. Again, that’s optional. Licensing-wise, since you write the code, you own it entirely. Any libraries you include might have their own open-source licenses, but those are typically permissive for usage. There’s no concern about code ownership or platform lock-in – you are in control of all the code and can even open-source your project if you want. In summary, the VS Code path can be pursued at essentially zero cost (aside from your time), making it very attractive for budget-sensitive founders who are willing to invest sweat equity to learn and build. The trade-off is time: what you don’t pay in money, you may pay in hours spent coding or debugging.
Pros of VS Code
- Maximum control and flexibility: You can design your MVP exactly to your specifications. Any feature or integration is possible because you’re writing the code or choosing the libraries. There are no artificial limitations – you’re not confined to Firebase services or an AI’s capabilities. If you want a specific UI style or an uncommon feature, you can implement it. This control also means you can keep the app lean: only include what you need, potentially making it faster and more optimized than a generic generated app.
- Strong community and resources: VS Code and the web development ecosystem have vast communities. Whatever you’re trying to build, chances are someone has done something similar and shared knowledge about it. This community support can guide you through problems. The editor itself has excellent documentation and an active user base; plus, Stack Overflow is full of Q&A for issues you might hit. Essentially, you’re never alone when coding in VS Code – help is a search away.
- Professional-grade development experience: Using VS Code means your project is structured in a standard way. If you later bring on a developer or team, they can pick up your MVP without having to migrate it from a proprietary system. This makes it easier to evolve the MVP into a full product. Moreover, VS Code’s built-in Git support and debugging tools are very useful for maintaining code quality . Even as a beginner, you can start using version control and test debugging, which reduces the chance of catastrophic mistakes and helps you learn best practices.
- Free and no lock-in: From a budget perspective, it’s hard to beat free tools. You can iterate without worrying about hitting a usage cap or trial limit. And you won’t have to rewrite anything due to vendor constraints; for example, if you started with a quick-and-dirty approach and then later want to switch to a different database, you can do that since you control the code. This “future-proofing” is a pro if you anticipate needing high scalability or custom infrastructure eventually. Essentially, VS Code grows with you: it’s used by beginners and scaled up to the needs of large projects as well.
- Optional AI assistance: While not built-in, you do have the option to bring AI help into VS Code via extensions like GitHub Copilot or ChatGPT extensions. This means you can approximate some of Cursor’s benefits (like code suggestions) inside VS Code . You could, for instance, use Copilot to help write a function or use an extension that lets you chat with ChatGPT about your code. This way, you can get the best of both worlds: maintain full control while getting hints and snippets from AI to speed up your work.
Cons of VS Code
- Steepest learning curve and slower initial progress: If you’re not already comfortable with coding, building an MVP in VS Code will likely take the longest time among these options. You have to learn the languages (HTML/CSS/JS at a minimum for web apps), frameworks, and tools essentially from scratch. There’s a lot of ground to cover – from laying out a UI to handling app state to connecting a database and more. This approach might be overwhelming if you need an MVP quickly to test your idea. In contrast to getting something visible in 10 minutes with Firebase Studio, coding everything could take days or weeks of learning and experimenting before you have a working prototype.
- Potential for getting stuck or discouraged: Without an AI or a guided environment, it’s easy to hit roadblocks (a bug you can’t figure out, a feature you don’t know how to implement) and not know where to turn. While community help is abundant, it still requires formulating your question and understanding the answers. Debugging can be frustrating for newcomers – e.g., a small syntax error could break your app and you might not spot it for hours. This risk of running into issues is higher when you’re writing all the code. Essentially, the development risk is on you: there is no support agent or wizard to bail you out if something isn’t working.
- Everything takes manual effort: Want to add authentication? You need to find a library or write the logic yourself. Need a database? You have to set one up or use a service’s SDK. Wish for a nicer UI? You must incorporate a CSS framework or style it manually. All these steps – while doable – add time and complexity. There’s a lot of context-switching (writing code, then configuring dev environment, then deploying, etc.), which can be quite a lot for one person. In managed tools, those pieces are more streamlined. With VS Code, you wear all the hats (developer, tester, DevOps, UI designer), which can be exhausting and might lead to cutting corners (maybe you skip implementing notifications initially because it’s too hard – which could be fine, but means your MVP is missing that feature until you find time).
- Comparatively less “wow” in the short term: If you’re demoing to stakeholders, an AI-generated prototype might have some slick aspects off the bat (like a quick visual interface) that you’d have to manually create in VS Code. Depending on your design skills, a hand-made MVP could look more rudimentary initially than one composed by Firebase Studio with Material Design components. Of course, you can make it polished, but that again is on you. The initial version you get with pure coding might not impress as quickly unless you invest in UI/UX effort.
- Requires maintenance and updates by you: In no-code or low-code tools, a lot of maintenance (security updates, library updates) is handled by the platform. In VS Code, if you set up a project with various packages, you’ll need to keep an eye on updates, fix vulnerabilities, etc. It’s part of normal development, but it’s another task on your plate. Also, if any part of your stack changes (APIs deprecate, etc.), you’ll need to fix it. This is usually not a big issue for an MVP, but it’s worth noting that the responsibility is yours.
Comparison summarizing key differences between Cursor, Firebase Studio, and VS Code
Below is a comparison table summarizing key differences between Cursor, Firebase Studio, and VS Code for building a web-based MVP:
| Aspect | Cursor (AI Code Editor) | Firebase Studio (AI Builder) | VS Code (Manual Coding) |
|---|---|---|---|
| Approach/Tool Type | AI-enhanced coding in a familiar IDE (VS Code-based) – you write prompts and edit code with AI assistance. | AI-driven visual app building environment – generates full-stack app from natural language, with Firebase backend . | Traditional code editor – you hand-code the entire app (optionally using AI plugins for suggestions) . |
| Ease of Setup | Download & install app; minimal setup (just add API key for AI) . Familiar interface for those who know VS Code. | No install needed – runs in browser with Google login . Start a project with a prompt or template in minutes. | Download & install editor (free, cross-platform) . Then manually set up project structure, runtime (e.g. Node.js), etc. |
| Learning Curve for Non-Dev | Moderate – AI helps generate code, but you need some coding understanding to guide and fix things. Good for those willing to learn coding with AI support. | Low – very beginner-friendly to get a basic app running. Some learning needed to refine prompts or make advanced tweaks. Feels like a guided, visual process. | High – must learn programming fundamentals, frameworks, and debugging. Lots of self-guided learning and troubleshooting required. |
| UI Development | No drag-and-drop; AI can create UI code (HTML/CSS, React, etc.) based on descriptions. You can then adjust code manually. | Visual prototype editor with live preview. AI generates initial UI, and you can rearrange components, change styles via GUI . Limited by template-style outputs, but quick iteration. | Manual UI coding or use of UI frameworks. Full freedom in design, but must write HTML/CSS or JSX. Visual tweaks require code changes (or design tools) – no built-in WYSIWYG editor. |
| Backend & Database | No built-in backend – you choose and code it. AI can scaffold e.g. an Express API or integrate a database (SQL/NoSQL) on request. Flexibility to use any backend (Firebase, Supabase, custom server, etc.). | Backend is automatically provisioned using Firebase (Firestore DB, Cloud Functions) . Data model might be simplistic unless specified. You can write custom server logic via Cloud Functions (AI or manually). | No default backend – up to you. Can code a custom server or use cloud services. Many options (Node, Python, cloud SaaS); must implement connections and data model by hand. |
| Auth & User Accounts | Not automatic; you can have AI set up authentication (e.g. using Firebase Auth or JWT) by generating the necessary code. Requires testing and configuration by you. | Typically easy: Firebase Auth can be enabled. If prompted, AI may add a login/signup UI . Might need a nudge if initial generation omitted it. Handles user management via Firebase. | No built-in auth – implement yourself or use libraries (Passport.js, Auth0, Firebase SDK, etc.). Complete control over auth method, but also all the work (UI, validation, security) is yours. |
| Notifications | Achieved via code (AI can help write it). For example, integrate Firebase Cloud Messaging or an email API. You must specify scheduling or triggers in code. | Supported by Firebase (FCM for push). AI might set up a basic notification if included in prompt (results vary). Otherwise, you can add a Cloud Function or use Firebase extensions for scheduled notifications. | Entirely manual. You pick approach (e.g. schedule cron jobs on server, integrate with push notification service, or send emails). Full flexibility to choose push vs email vs SMS, but you build it. |
| Deployment | No one-click deploy. You deploy like any code project (FTP/CLI to cloud host). AI can assist in creating deploy scripts or configs (Dockerfile, CI pipeline). You handle hosting (e.g. Vercel, Netlify, Firebase Hosting via CLI). | One-click deploy to Firebase Hosting from Studio UI . After linking a billing account (for free tier limits), publishing is mostly automated. Also supports export to Git and other deploy targets (Cloud Run, etc.) . | No integrated deployment – you choose a hosting solution and deploy manually. Could be simple (Netlify/Vercel linking) or custom (set up a server). Need to manage environment setup (e.g. domain, SSL) yourself or via hosting provider guides. |
| Mobile Support | Can create mobile apps via code (React Native, Flutter, etc.) – AI will help generate code if asked, but you must handle emulators/builds. Primarily geared to web, but flexible to any platform since it’s code-centric. | Designed for cross-platform: has web preview and Android emulator built-in . Can generate mobile app code (e.g., Flutter) with AI guidance. Aims to let you build web and mobile in one place, though mobile generation is still evolving. | Can develop mobile apps (many devs use VS Code for Flutter/React Native). But requires setting up SDKs, emulators, and knowledge of mobile development. No special support – just a code editor. For a simple path, focus on responsive web design first. |
| Pricing | Free tier (approx 2K AI completions/month) and limited GPT-4 usage . Pro Plan $20/month for unlimited use and faster GPT-4/Claude access . Editor itself is free; cost is for AI assistance. | Free during preview (up to 3 projects) . Firebase services have generous free limits; pay-as-you-go for usage beyond that . No separate fee for the Studio tool as of now. | Editor is free (open-source). Building and running the app can be done on free tiers of various services. Potential costs if you use paid APIs or choose paid hosting, but you control all choices. Copilot AI in VS Code is ~$10/mo if used (optional). |
| Key Strengths | – AI speed-up: Write features in natural language and get working code quickly. – Flexibility: Not limited to one stack; full code access to customize anything. – Code ownership: Outputs standard code you can export, modify, and scale with a dev team later. | – Beginner-friendly: No coding needed for basic app; visual editing and prompt-based creation. – All-in-one: Handles front-end, back-end, and deployment seamlessly. Firebase services give immediate functionality (DB, auth, hosting). – Rapid prototyping: Can get a functional prototype in minutes to hours, great for demos and concept validation. | – Ultimate control: You can use any framework or service; tailor every aspect to your needs. – Mature ecosystem: Tons of extensions and community support. Proven tools for debugging, version control, etc. – No platform lock-in: Completely free and open approach. Easy to hand off to developers or continue expanding without rewrites. |
| Key Drawbacks | – Still requires coding mindset: Not entirely no-code; must understand and debug code when AI output isn’t perfect. – AI quirks: Might produce errors or need iterative prompting; not always 100% correct . – Deployment not integrated: You handle the devops steps (though AI can guide). | – Beta limitations: As a preview product, can be buggy or incomplete – not fully reliable for complex apps yet . – Less fine control: AI might not capture all nuances; you may have to accept a generic implementation or invest time to refine it. – Firebase-centric: You are largely tied to Google’s ecosystem, which might be an issue if you want to migrate off later. | – Steep learning curve: Requires time to learn programming and web development. Slowest initial build speed if you start from zero. – Everything manual: You must integrate all features yourself; nothing is pre-made. – Potential to get stuck: Without experience or guidance, bugs or design challenges can halt progress and require outside help. |
Recommendation and Conclusion
Choosing the right tool depends on your goals, technical comfort, and budget. Here’s a quick guide:
- If you are a non-developer who wants the quickest path to a working MVP, Firebase Studio is very appealing. It can spin up a basic habit tracker with minimal effort, allowing you to focus on your idea rather than coding. You’ll get a functional prototype (with data storage, maybe a simple UI, possibly even a shareable link) in a short time. This is great for validating the concept or pitching to stakeholders without investing in engineering. Just keep expectations in check: the result might be rough around the edges, and you may encounter some of the preview-phase quirks . It’s ideal for experimenting and learning what’s possible. Plus, it’s essentially free to try, so it’s very budget-friendly for early stages. If Firebase Studio’s output meets your needs, you’ve saved a lot of time and money. If not, you’ll at least have a clearer idea of your requirements to inform the next steps.
- If you have some technical inclination or are willing to get your hands dirty with code (but still want AI help), Cursor offers a nice middle ground. It’s like having an AI tutor/helper by your side as you build the MVP. For a founder with limited coding experience, this can significantly lower the barrier – you can implement features by describing them, and then study the AI’s code to understand how it works. Over time you’ll gain knowledge, which is valuable in itself. Cursor is particularly good if you anticipate needing more custom logic or a unique UI that a one-size-fits-all tool might not deliver. It gives you flexibility without starting from a blank slate. In the context of the habit tracker, maybe Firebase Studio couldn’t set up a nuanced reminder system – with Cursor you could explicitly code (with AI) something like “if user hasn’t checked in by 8pm, send a reminder email, else skip,” tailoring the feature. The cost is moderate (you might upgrade to the $20/month plan during development, then cancel if you want) and far cheaper than hiring a developer. In short, choose Cursor if you want more control than Firebase Studio provides, but you still appreciate AI speeding up your work.
- If you or someone on your team is already a competent developer (or you have a strong desire to learn coding thoroughly), then using VS Code or a traditional coding approach gives you the most power and precision. This route is recommended when you have specific requirements that out-of-the-box tools can’t meet, or when you’re building a foundation you plan to grow long-term. For example, if your habit tracker MVP is already aiming to be quite sophisticated (maybe complex analytics, highly customized UI/branding, or integration with other systems), you might be better off coding it so you have full control and no technical debt from quick tools. VS Code is also the path to choose if you found the other tools too limiting – e.g., some founders try a no-code/low-code solution, hit a wall, and then switch to custom coding to overcome that. It will likely take more time and effort, but the result can be a cleaner, more scalable codebase. From a budget perspective, it costs nothing except your time (or possibly a small Copilot subscription), but time is a cost to consider in a startup scenario. If speed to market is crucial and you’re the only one building, fully manual coding might delay you, unless you’re rapidly learning or have prior coding ability. One compromise some take is to start in Firebase Studio to get a prototype, then export or rebuild properly in VS Code once the concept is proven. That way you benefit from quick validation and still end up with a maintainable codebase.
In conclusion, for a typical startup founder without a dev background and with a tight budget, Firebase Studio is the recommended first step – it addresses common MVP needs (database, auth, hosting) with almost no upfront cost and very little time. You can get a sense of your app’s potential and even use that prototype for user testing or pitching. If Firebase Studio provides everything you need, fantastic – you’ve avoided months of coding. If you find it lacking (which could happen if your needs are complex or you hit its beta limitations), you haven’t lost much except time. At that point, you can evaluate moving to Cursor or full coding. Cursor is great as a “next step up” when you require more customization: it will let you gradually refine or rebuild the MVP with more bespoke features, essentially teaching you along the way, without the full burden of manual coding. Finally, as your project solidifies and perhaps gains traction, you might migrate the code into a standard VS Code environment (if you weren’t already using Cursor’s VS-Code-like interface) for ongoing development, or bring in developers who can take the code further. Each tool has its role: Firebase Studio for speed and simplicity, Cursor for flexibility with AI assistance, and VS Code for ultimate control. By starting lean and gradually increasing complexity only as needed, you can save budget and validate assumptions early, all while keeping the door open to a more robust build when the time is right.
Ultimately, the best approach is one that gets your MVP into users’ hands quickly so you can gather feedback, while also aligning with your team’s skills and long-term plans. With the options of Cursor, Firebase Studio, and VS Code, you have a spectrum from no-code to full-code to choose from. Many founders might even use them in combination (for example, using Firebase Studio to generate an initial app, then importing it into VS Code to tweak the code, possibly with Cursor’s help). By leveraging these modern tools, you can significantly reduce the need for a large development budget at the MVP stage. Each has pros and cons, but all three are powerful allies for a resourceful entrepreneur. Consider your specific needs for the habit tracker MVP – do you prioritize speed, ease, or custom functionality? – and pick the tool that fits best. And remember, an MVP’s goal is to learn and iterate quickly; whichever tool helps you do that effectively with the least friction is the right choice.
Discover more from gimburg 🟢 online
Subscribe to get the latest posts sent to your email.